Add and manage artifacts
Add artifacts at the record or documentation section level, update your artifacts to include proposed remediation plans and supporting documentation, or delete artifacts that no longer need to be tracked.
Prerequisites
Add artifacts on documentation
In the left sidebar, click Inventory.
Select a record or find your record by applying a filter or searching for it.5
In the left sidebar that appears for your record, click Documents and select the Latest tab.6
Click on a Development type file.7
On your record’s documentation page, click Add Artifact.
Select the artifact type8 you want to add:
- Validation Issue
- Policy Exception
- Limitation
On the modal that opens, provide information for your artifact.
When you are done, click Add {Artifact Type} where
{Artifact Type}is the artifact type you want to add to submit the artifact.Once created, you can then add supporting documentation to your artifact.9
Add artifacts on validation reports
While assessing a record’s compliance,10 you can add artifacts as you complete your validation report:
In the left sidebar, click Inventory.
Select a record or find your record by applying a filter or searching for it.11
In the left sidebar that appears for your record, click Documents and select the Latest tab.12
Click on a Validation type file.13
Expand any subsection of the validation report you have attached evidence for to autogenerate validation issues or manually link artifacts to your report:
Always review AI-generated validation issues before approving them. The suggestions are based on patterns in your risk assessment notes and may need adjustment to accurately reflect your findings.
Use AI to automatically suggest validation issues based on the gaps identified in your assessment:14
14 This feature requires AI capabilities to be enabled for your organization — contact an administrator if you cannot access the Suggest Validation Issues interface.
In the Artifacts section under your evidence, click Suggest Validation Issues.
Click Suggest Validation Issues to have ValidMind analyze your risk assessment notes along with the guideline context and identify any gaps that warrant validation issues.
Review the suggested validation issues. Each suggestion includes:
- A proposed title and description outlining the issue
- A preliminary severity level based on the identified gap
- A proposed remediation plan
Click See more on each suggested issue to expand for more details.
Approve, reject, or regenerate the suggested validation issues:
Under each individual issue:
- Click Approve to create the validation issue and link it to your report.
- Click Reject to reject the suggestion if it doesn’t apply.
Click Suggest Validation Issues # and select:
- Approve All to approve all suggested issues at once.
- Reject All to reject all suggested issues at once.
Click Suggest Validation Issues # and select Regenerate Issues.
- After approving a validation issue, you can further customize it by clicking on the issue to edit fields such as owner, due date, and status.
Under your evidence, click Artifacts to expand the artifacts panel.
Click Link Artifact and select the artifact type15 you want to add:
- Validation Issue
- Policy Exception
- Limitation
On the Link Artifact to Report modal that opens:
- Select from the list of available artifacts.
- Click Add {Artifact Type} where
{Artifact Type}is the artifact type you want to add to create a new artifact,16 then select the new artifact from the list.
Click Update Linked Artifacts.
Confirm that the newly linked artifacts shown under Artifacts is accurate.
- 16
- Click Add {Artifact Type} where
{Artifact Type}is the artifact type you want to add to create a new artifact. - Enter the details for your artifact.
- Click Add {Artifact Type} to submit the artifact.
Update artifacts
As artifacts get resolved or require other changes during the validation process, you can update them:
Locate the artifact you want to update.17
Click on a field to make changes.
You can also add comments to an artifact.
Most updates are applied immediately but you must click Save to make changes to the artifact title, description, proposed remediation plan, and attachments effective.
Track artifact resolution
As you prepare your validation report, review open or past due artifacts, close resolved ones, or add a mitigation plan:
In the left sidebar, click Inventory.
Select a record or find your record by applying a filter or searching for it.18
In the left sidebar that appears for your record, click Validation Issues to view a list of validation issues associated with that record.
Go through the open validation issues one-by-one:
If the validation issue has been addressed —
- Add any final comments to assess how the issue was resolved.
- Under status, select
Closed.
If part or all of the validation issue remains to be addressed —
- Assess if the issue identified by the validation issue prevents the record from being approved.
- If a remediation plan is required, enter the details in the Proposed Remediation Plan section of the validation issue.
Track open issues until all validation issues are resolved or a remediation plan is in place for post-approval issues.
In the left sidebar that appears for your record, click Artifacts to view lists of other artifact types associated with that record.
Select an artifact type19 for a list of that artifact type:
- Policy Exception
- Limitation
Go through the open artifacts one-by-one:
If the artifact has been addressed —
- Add any final comments to assess how the issue was resolved.
- Under status, select
Closed.
If part or all of the artifact remains to be addressed —
- Assess if the issue identified by the artifact prevents the record from being approved.
- Add comments indicating next required steps.
Track open artifacts until all artifacts are resolved or plans are in place for post-approval issues.
Manage attachments on artifacts
After an artifact is created, you’re able to add supporting documentation to it.
- On the artifacts detail page, click on the attachments header.
Click Select Files to add a file.
- Add a note to the file by clicking on the menu, then select Add Note.
- Update a note by making your changes in the existing text field.
Click Save to submit the upload.
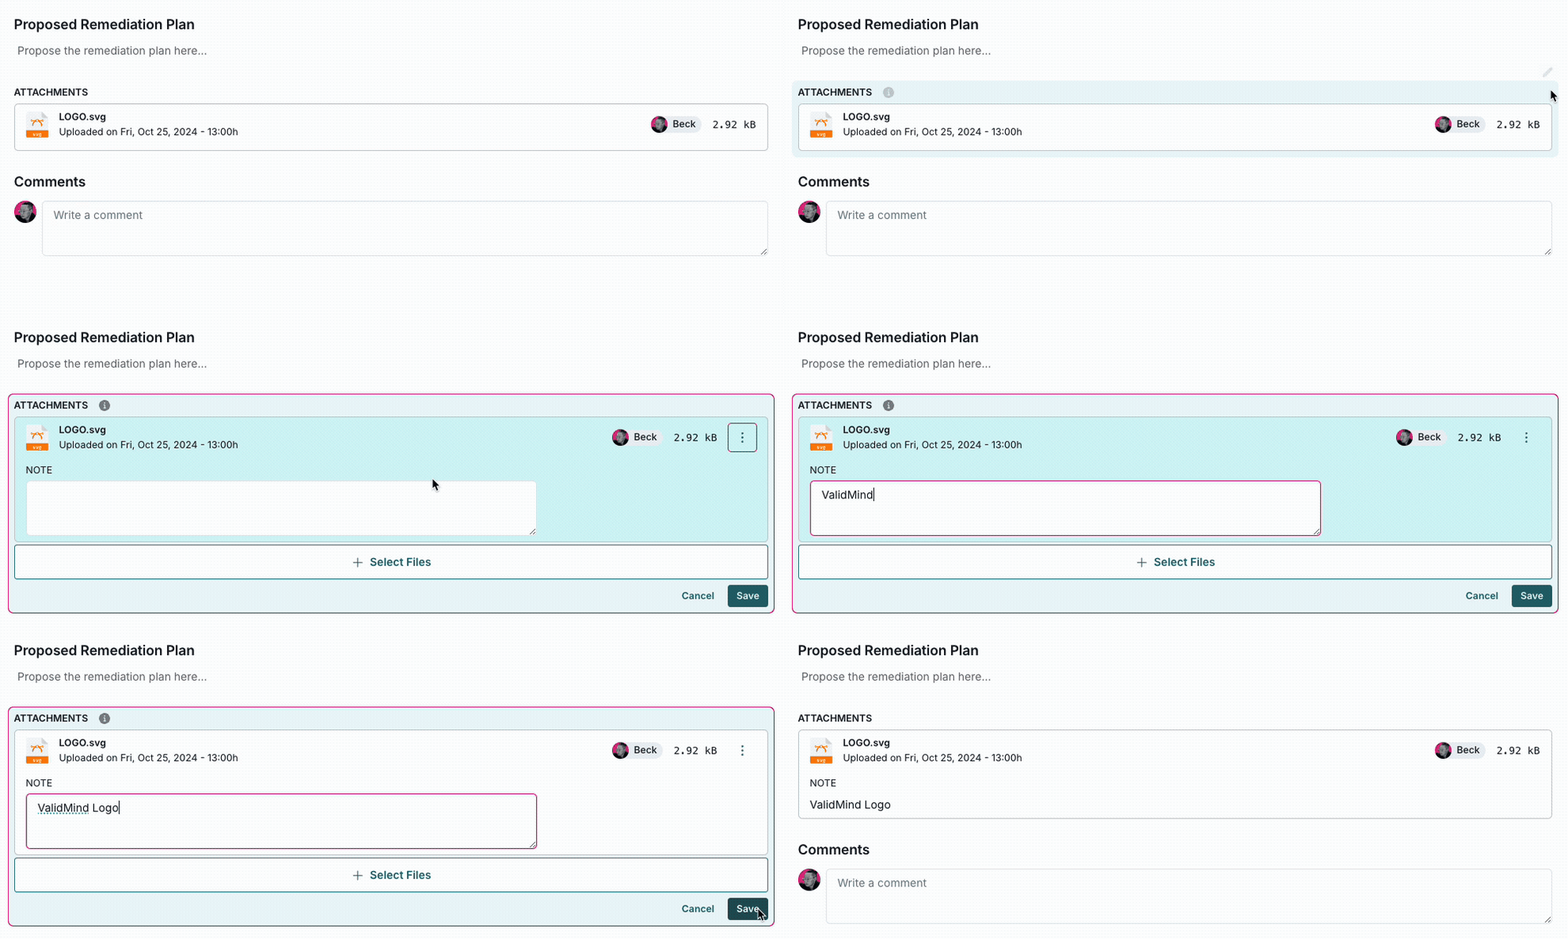
Adding attachment notes
- On the artifacts detail page, click on the attachments header.
Locate the file you want to remove, and click on the menu.
- Select Delete File to remove the file. Click Yes, Delete File to confirm permanent deletion of that file.
- Select Remove Notes to delete any notes. Removal of notes is saved automatically.
Click Save to apply the deletion.
After you save, the attachment or notes will be removed permanently.
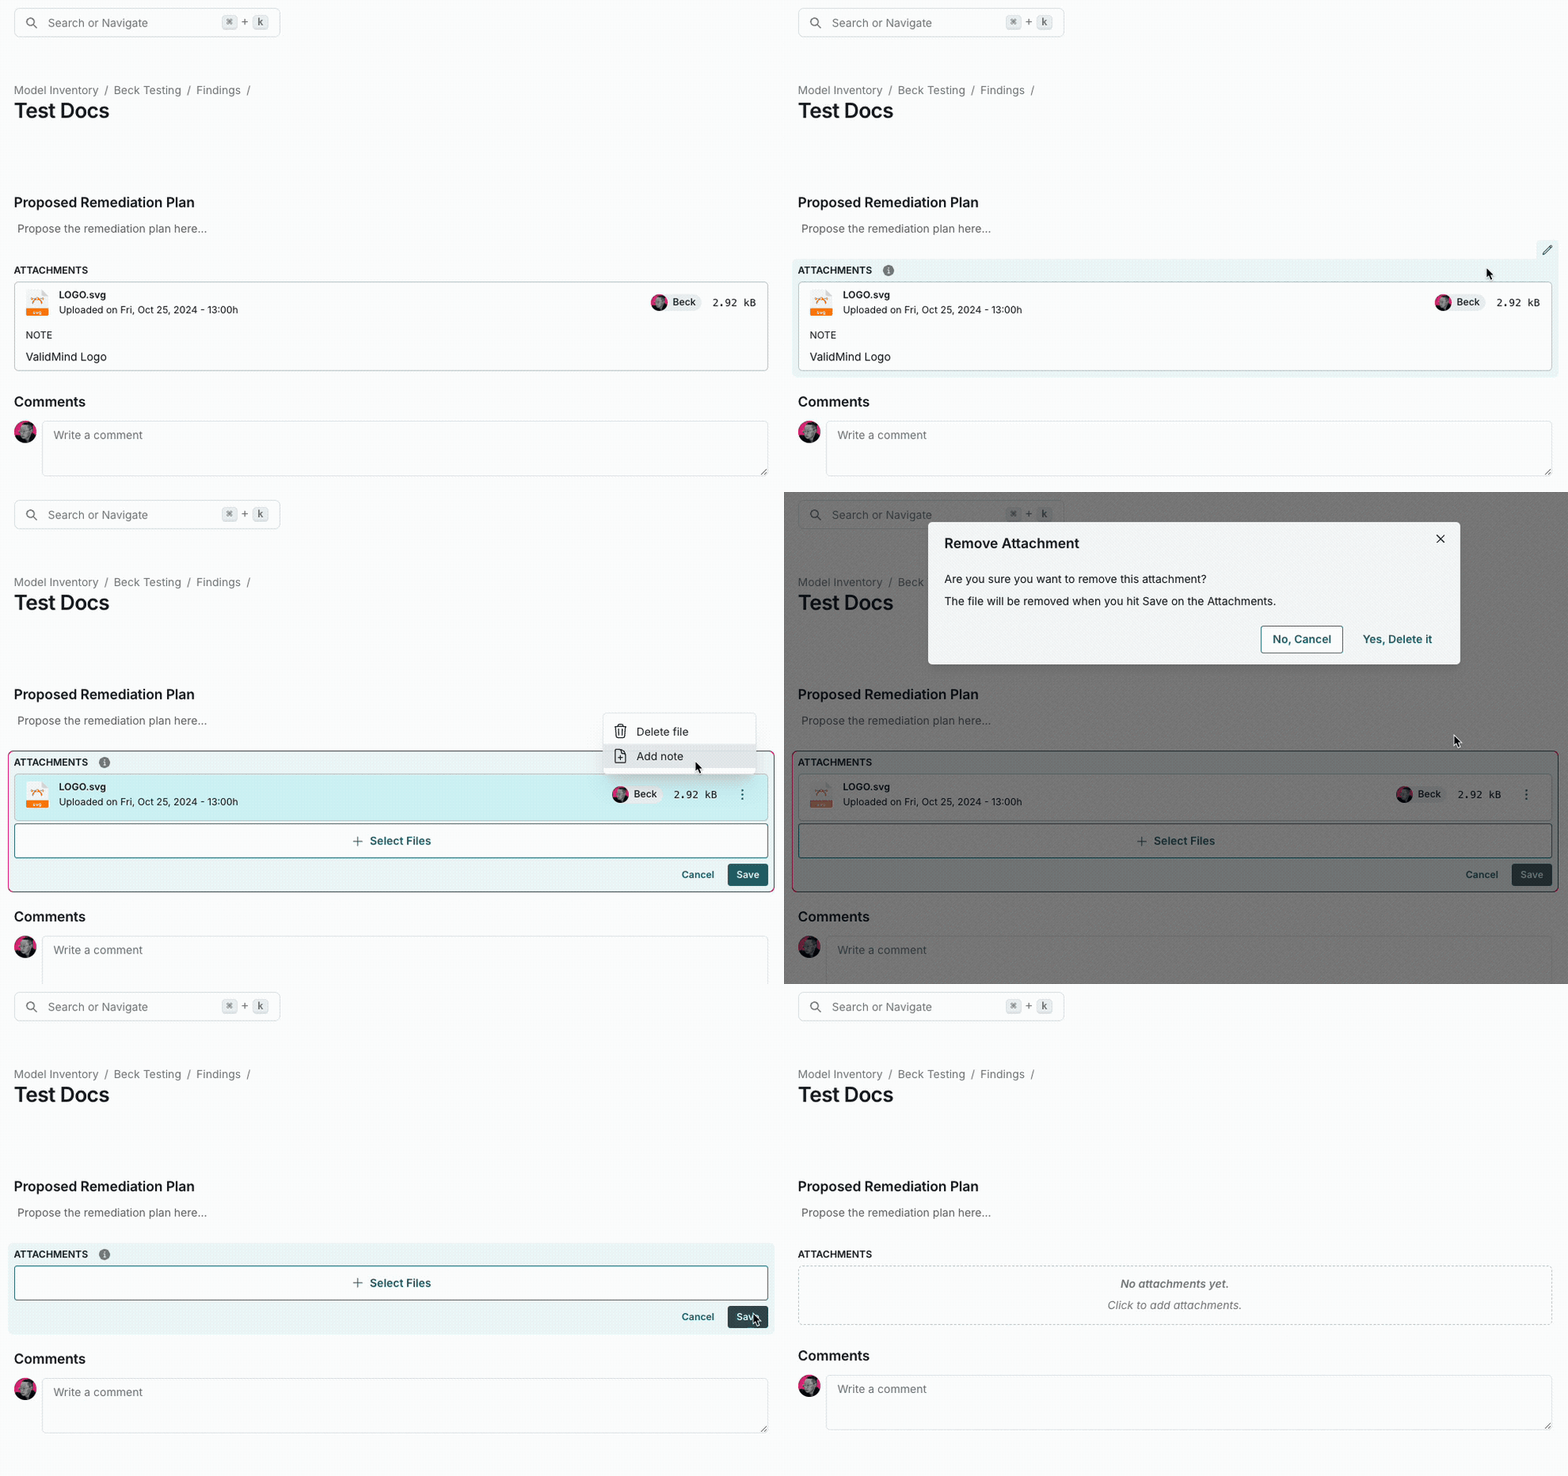
Deleting attachment notes and attachments
Delete artifacts
If you logged an artifact in error or otherwise no longer need to track that artifact, you can delete it: