Validator Fundamentals
Learn how to use ValidMind as a validator to generate validation reports, automate testing, and collaborate with your development team.
20 minutes
Use the ValidMind Library to run tests and validate a record (model), then attach your test results as evidence to your validation report in the ValidMind Platform.
Typically, you will be asked to validate a champion that has already been independently registered in the inventory and submitted to you. In this guide, we’ll use a model-type record for our example:
For this quickstart, you’ll register a dummy model first and assign yourself as the validator to familiarize you with the ValidMind Platform interface:
In the left sidebar, click Inventory.
Select Model by clicking on {Record} Inventory, where {Record} is the currently active type of record.3
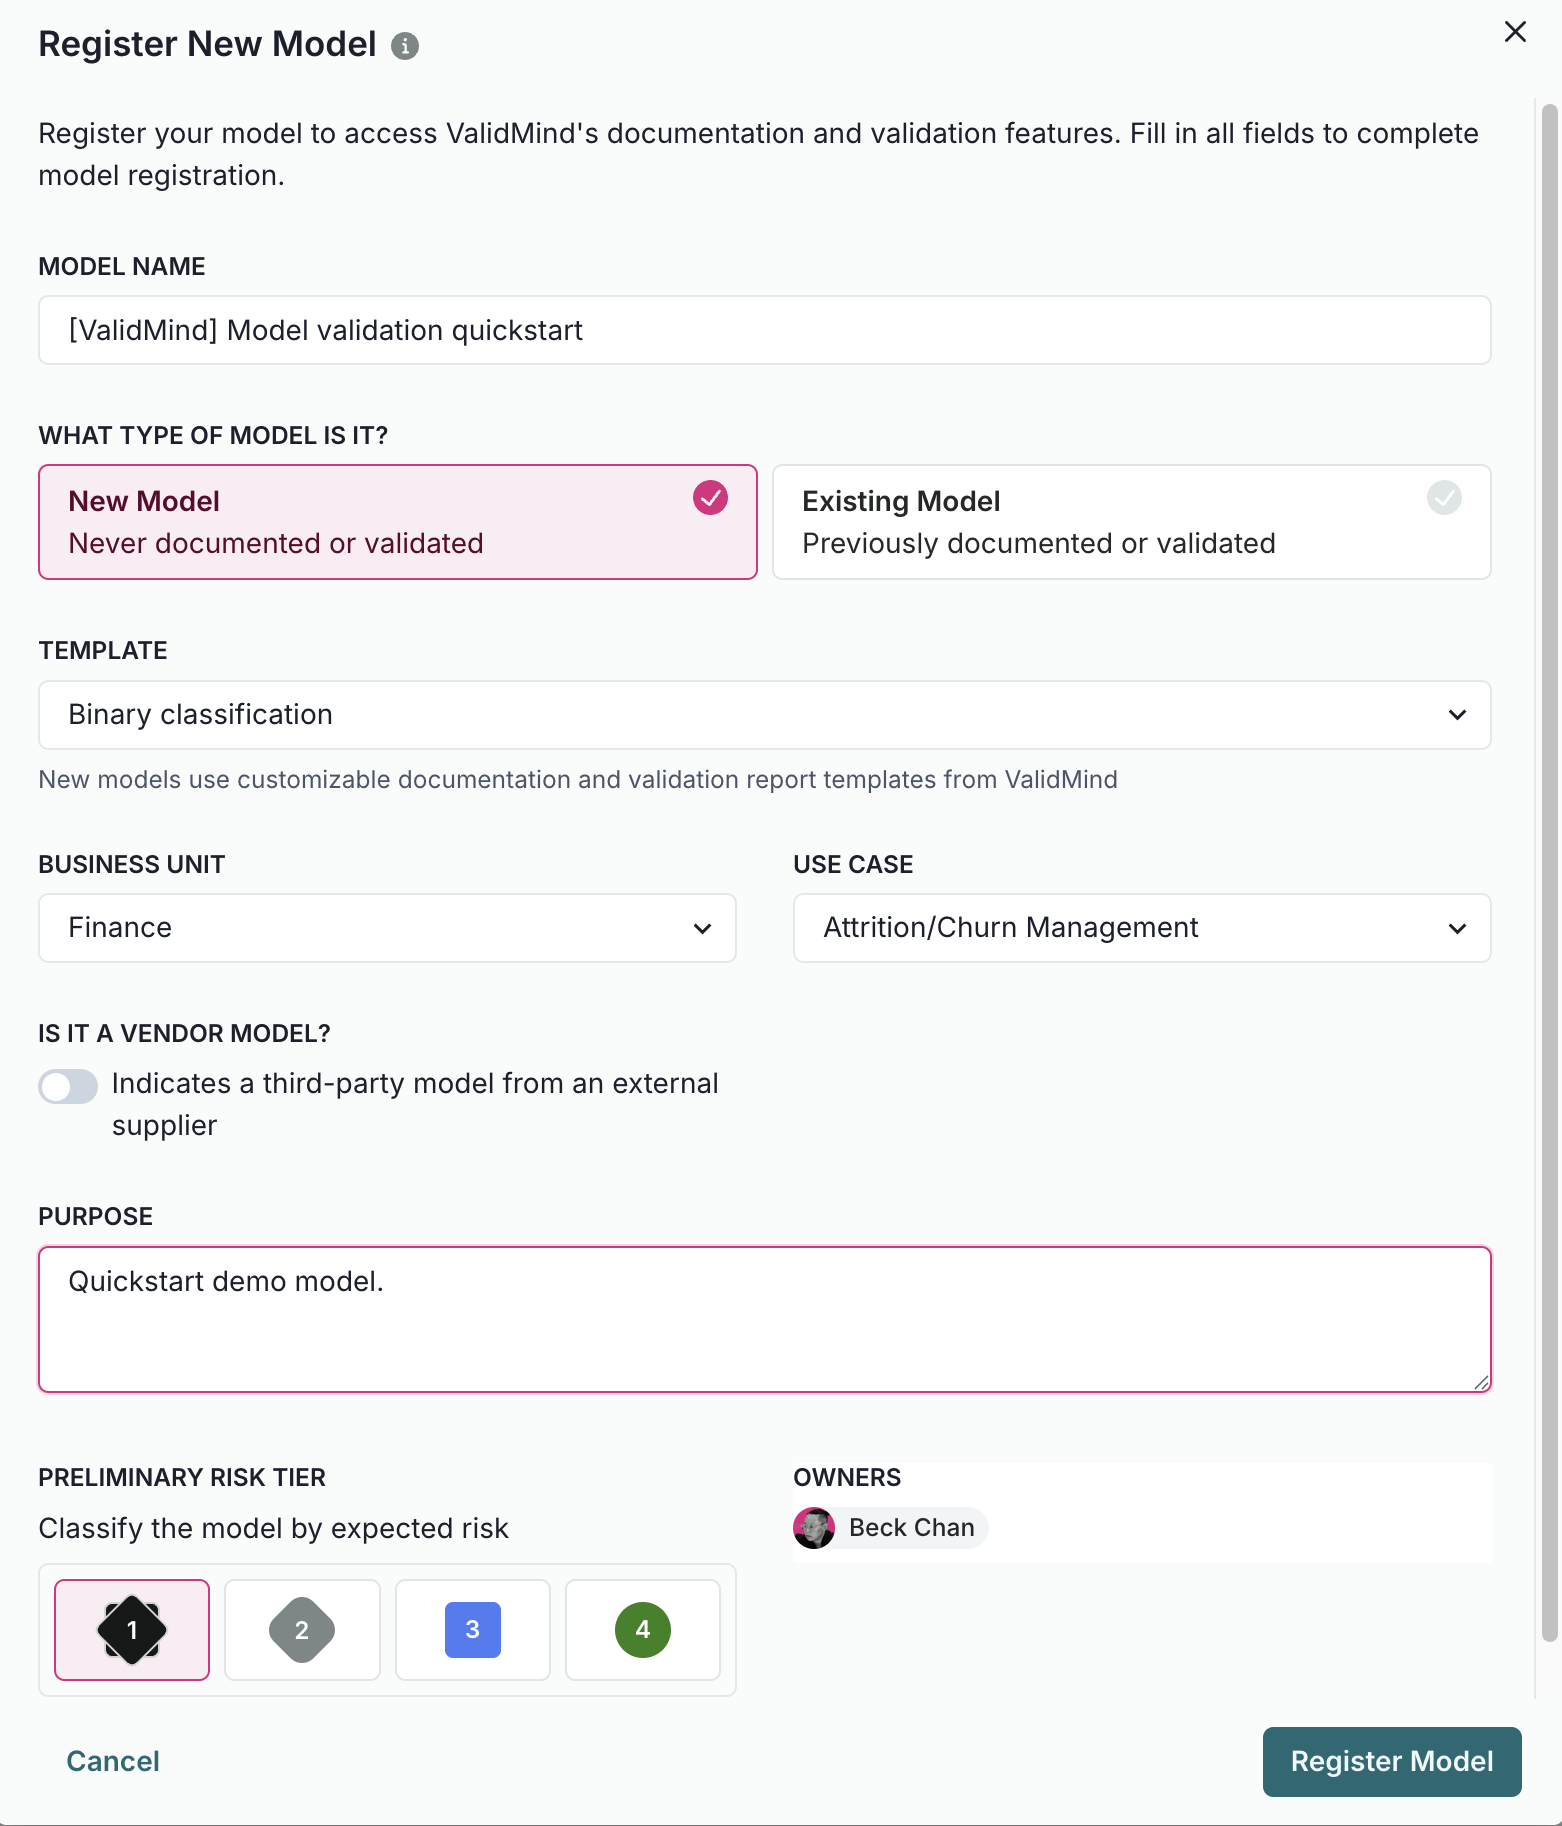
Click Register Model.
Enter the Record Name and select any option for the following required fields:
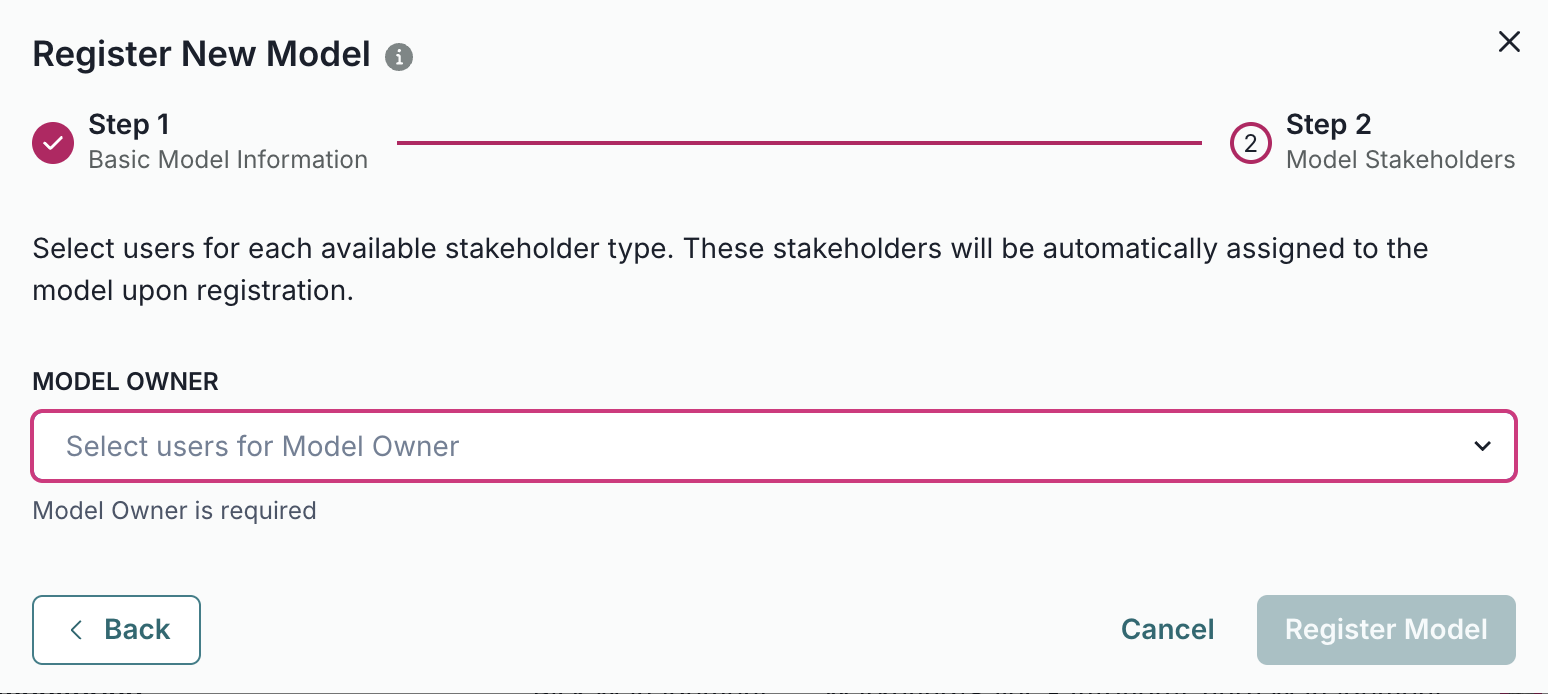
Finance1Click Next to continue to assignment of inventory record stakeholders.
Select your own name under the Record Owner drop-down — don’t worry, we’ll adjust these permissions next for validation.
Click Register Model to add the model to your inventory.
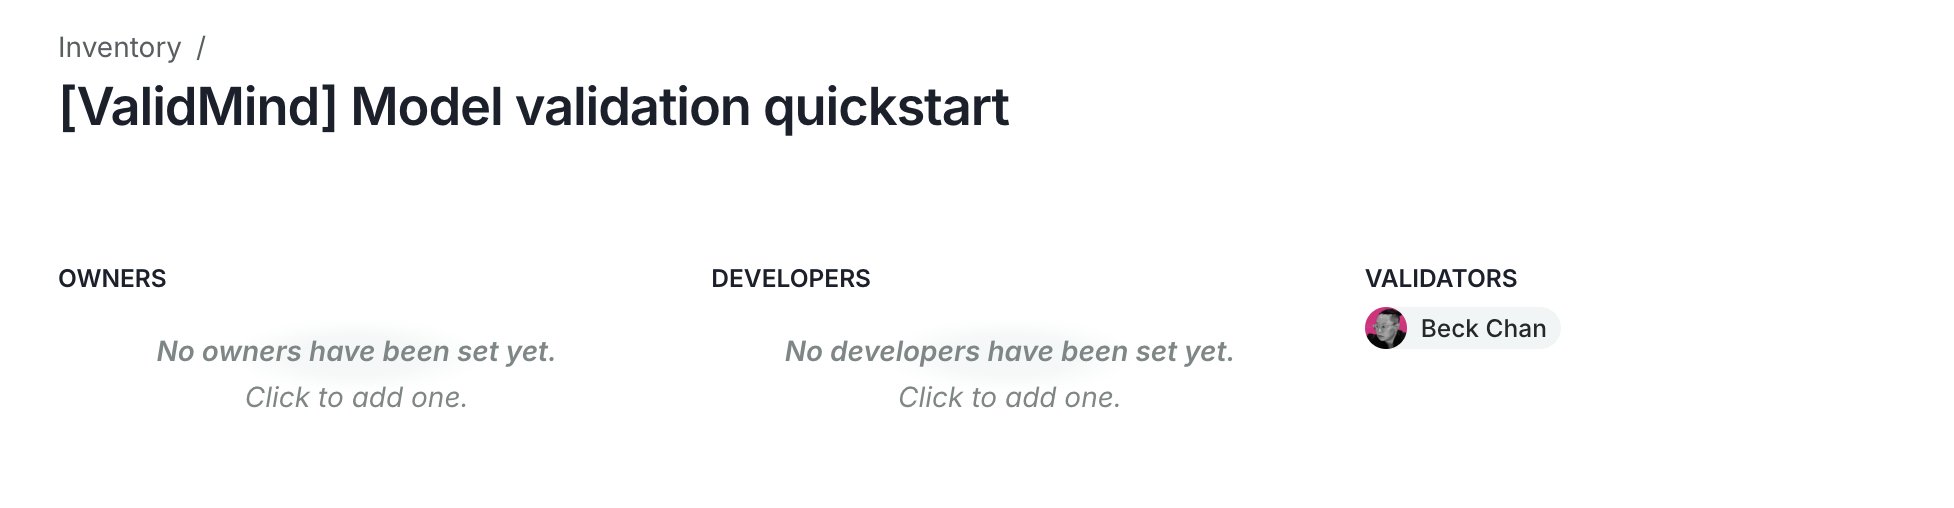
In order to log tests as a validator instead of as a developer, we’ll need to adjust your inventory record stakeholder permissions.
On the model details page after you’ve registered your model:
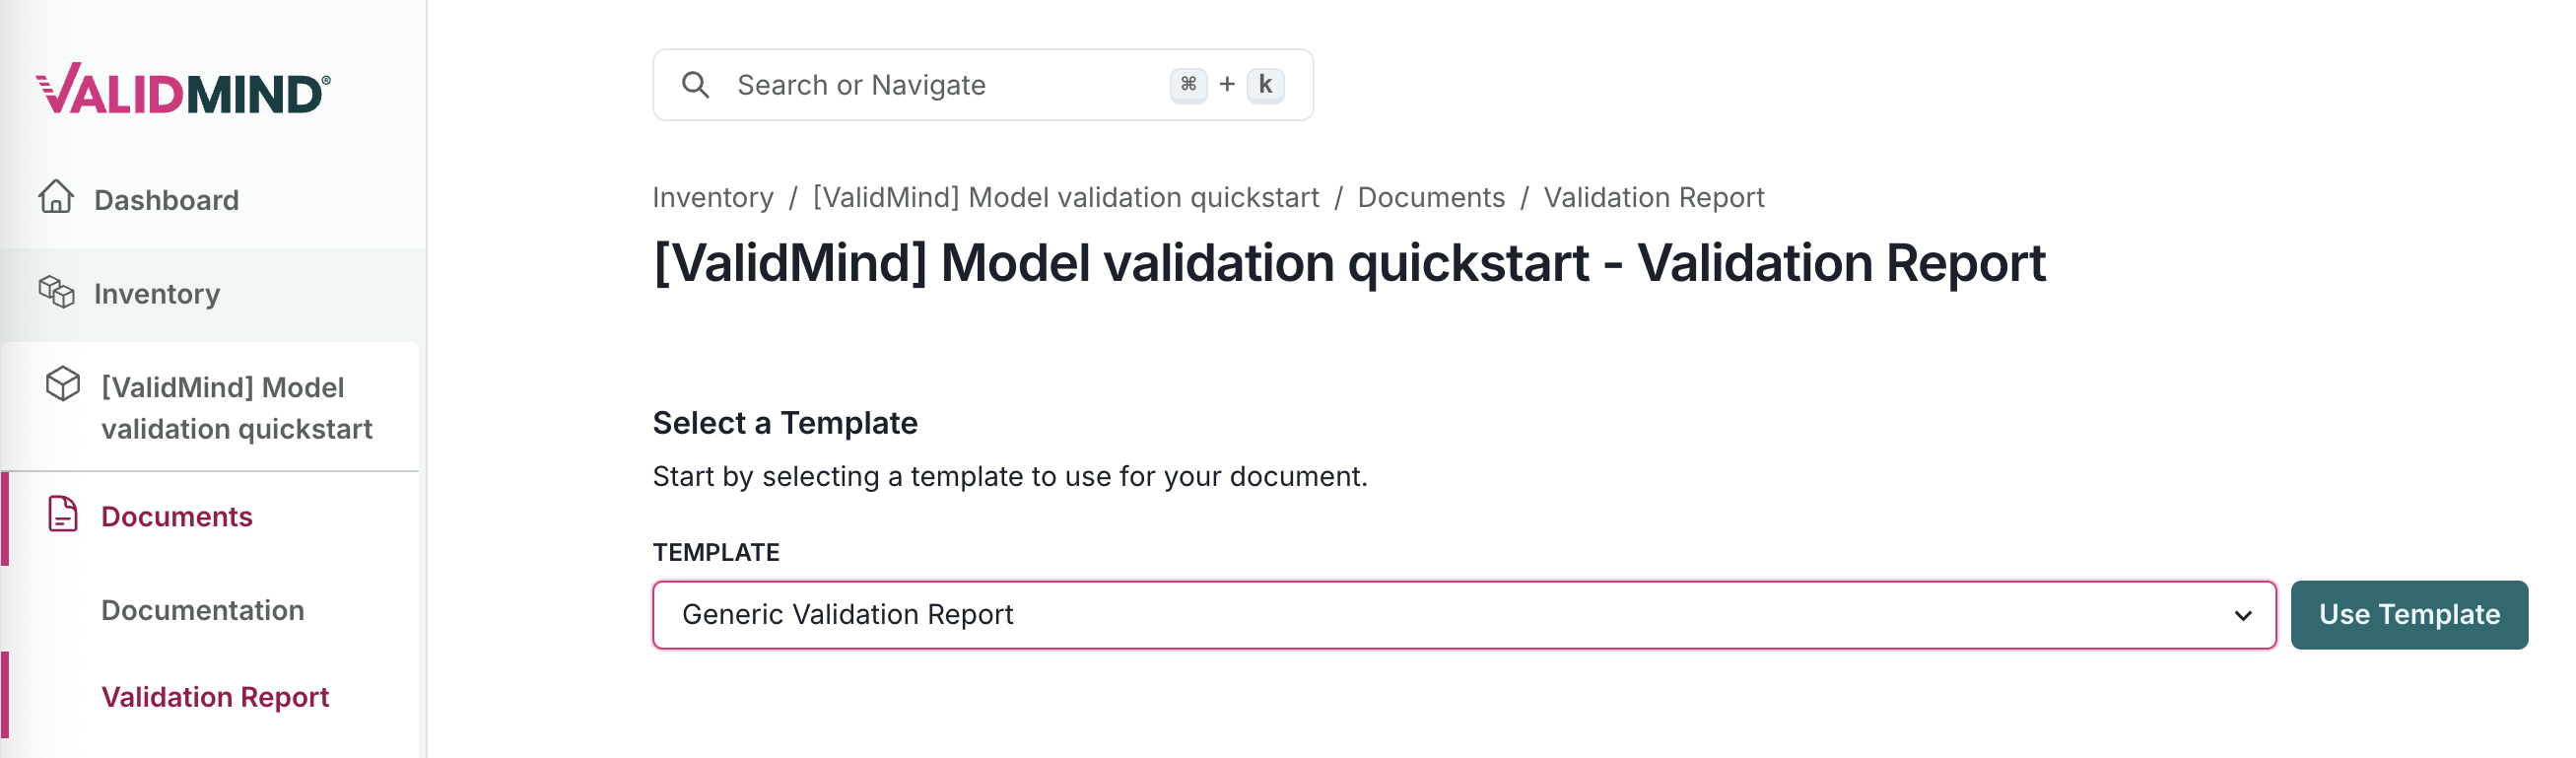
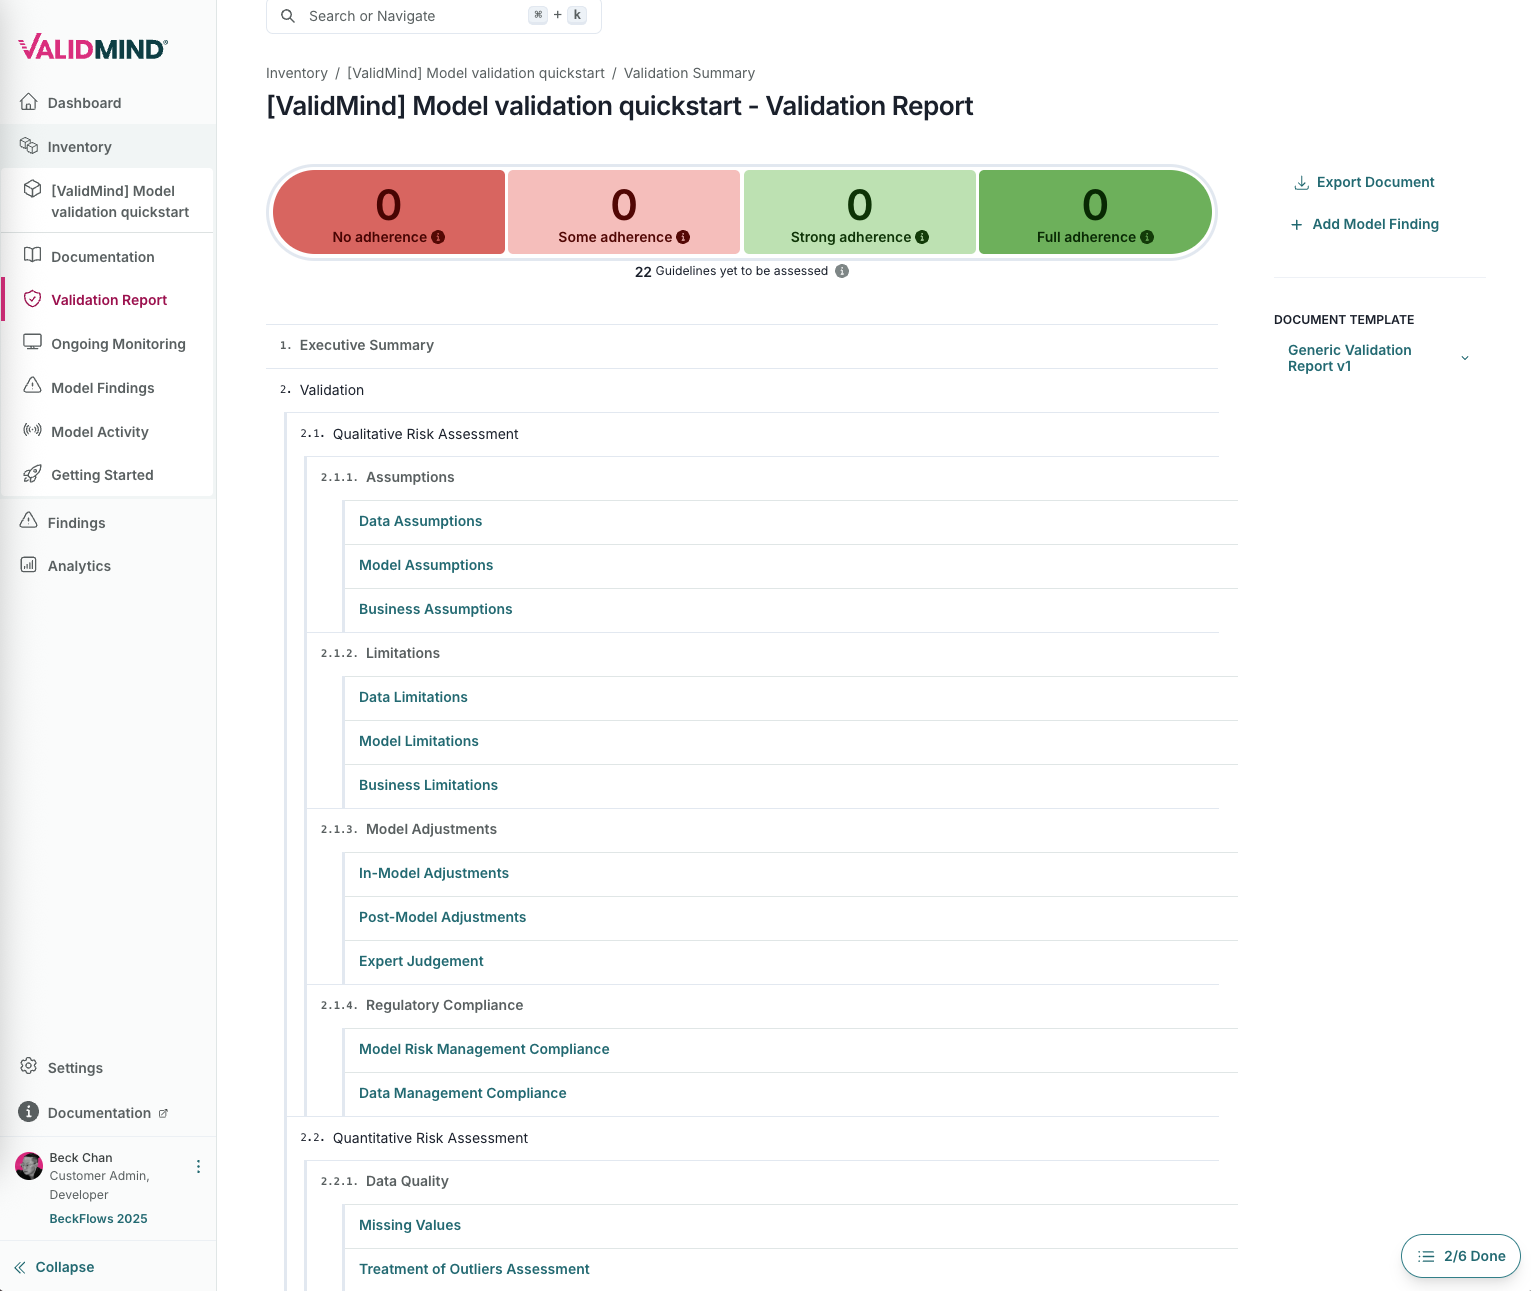
In the left sidebar that appears for your model, click Documents and select Validation.
Under Create Document, choose From ValidMind Template and then select Generic Validation Report from the Template drop-down menu.
Click Use Template to apply the template.
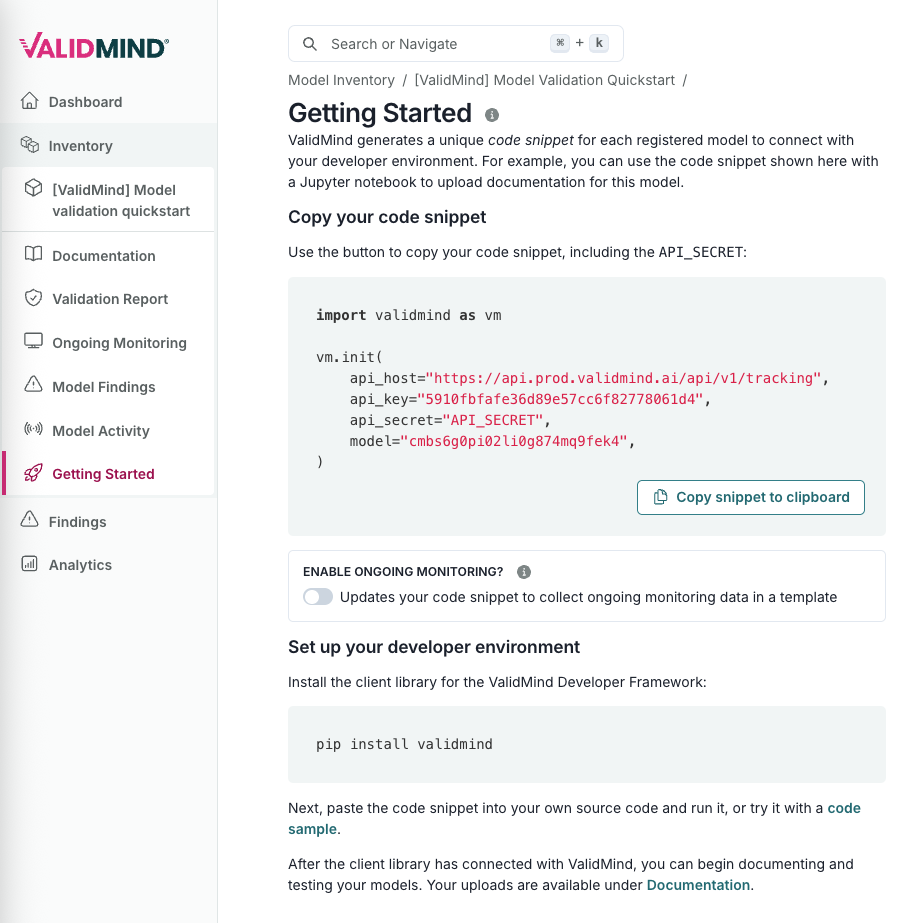
Before we move on, let’s also retrieve the unique code snippet for your model that enables you to connect your testing environment with the correct document in the ValidMind Platform:
In the left sidebar that appears for your model, click Getting Started.
Select Validation from the Document drop-down menu.
Click Copy snippet to clipboard.
Next, let’s set up the ValidMind Library in your validation environment of choice so we can use it to run and log tests, which helps automate the validation of your records.
Our companion notebook, Quickstart for validation,5 walks you through the steps of installing the library in your environment, initializing the library for use, and running data quality and model evaluation tests that log results to the ValidMind Platform.
You can either load the hosted version of our notebook, or download the notebook to run in your own local environment:
Sign in to JupyterHub with your ValidMind login.
Open Quickstart for validation and run the quickstart notebook.
Open a terminal or command prompt.
Navigate to the directory where you want to clone the repository.
Run the following command:
git clone https://github.com/validmind/validmind-library.gitAfter the cloning process is complete, open notebooks/quickstart/quickstart_validation.ipynb in your validation environment and run the quickstart notebook..
Download our selection of code samples: notebooks.zip
Navigate to the location where you saved notebooks.zip and extract the contents.6
Navigate to the folder where you extracted the files.
Open notebooks/quickstart/quickstart_validation.ipynb in your validation environment and run the quickstart notebook.
6 Depending on your operating system, you can right-click on notebooks.zip and select Extract All … or Extract Here, for example.
Follow the instructions to run the first two code cells in the notebook,8 which sets the stage by installing and initializing ValidMind.9
Under the cell at bottom of the Get your code snippet section, confirm that you see a success message verifying that you’ve connected to the right model.
This message verifies that the library works as expected as is connected to the correct model and document type within the platform.
Shift + Enter on Windows or Cmd + Enter if you are on a MacExample success message:
2025-06-11 22:06:42,610 - INFO(validmind.api_client): 🎉 Connected to ValidMind!
📊 Model: [ValidMind] Model validation quickstart (ID: cmbs6g0pi02li0g874mq9fek4)
📁 Document Type: validation_reportAfter you successfully run the notebook, return to the ValidMind Platform:
In the left sidebar, click Inventory.
Locate or search for the model you registered for this quickstart and click on it to select it.10
In the left sidebar that appears for the model, click Validation under Documents:
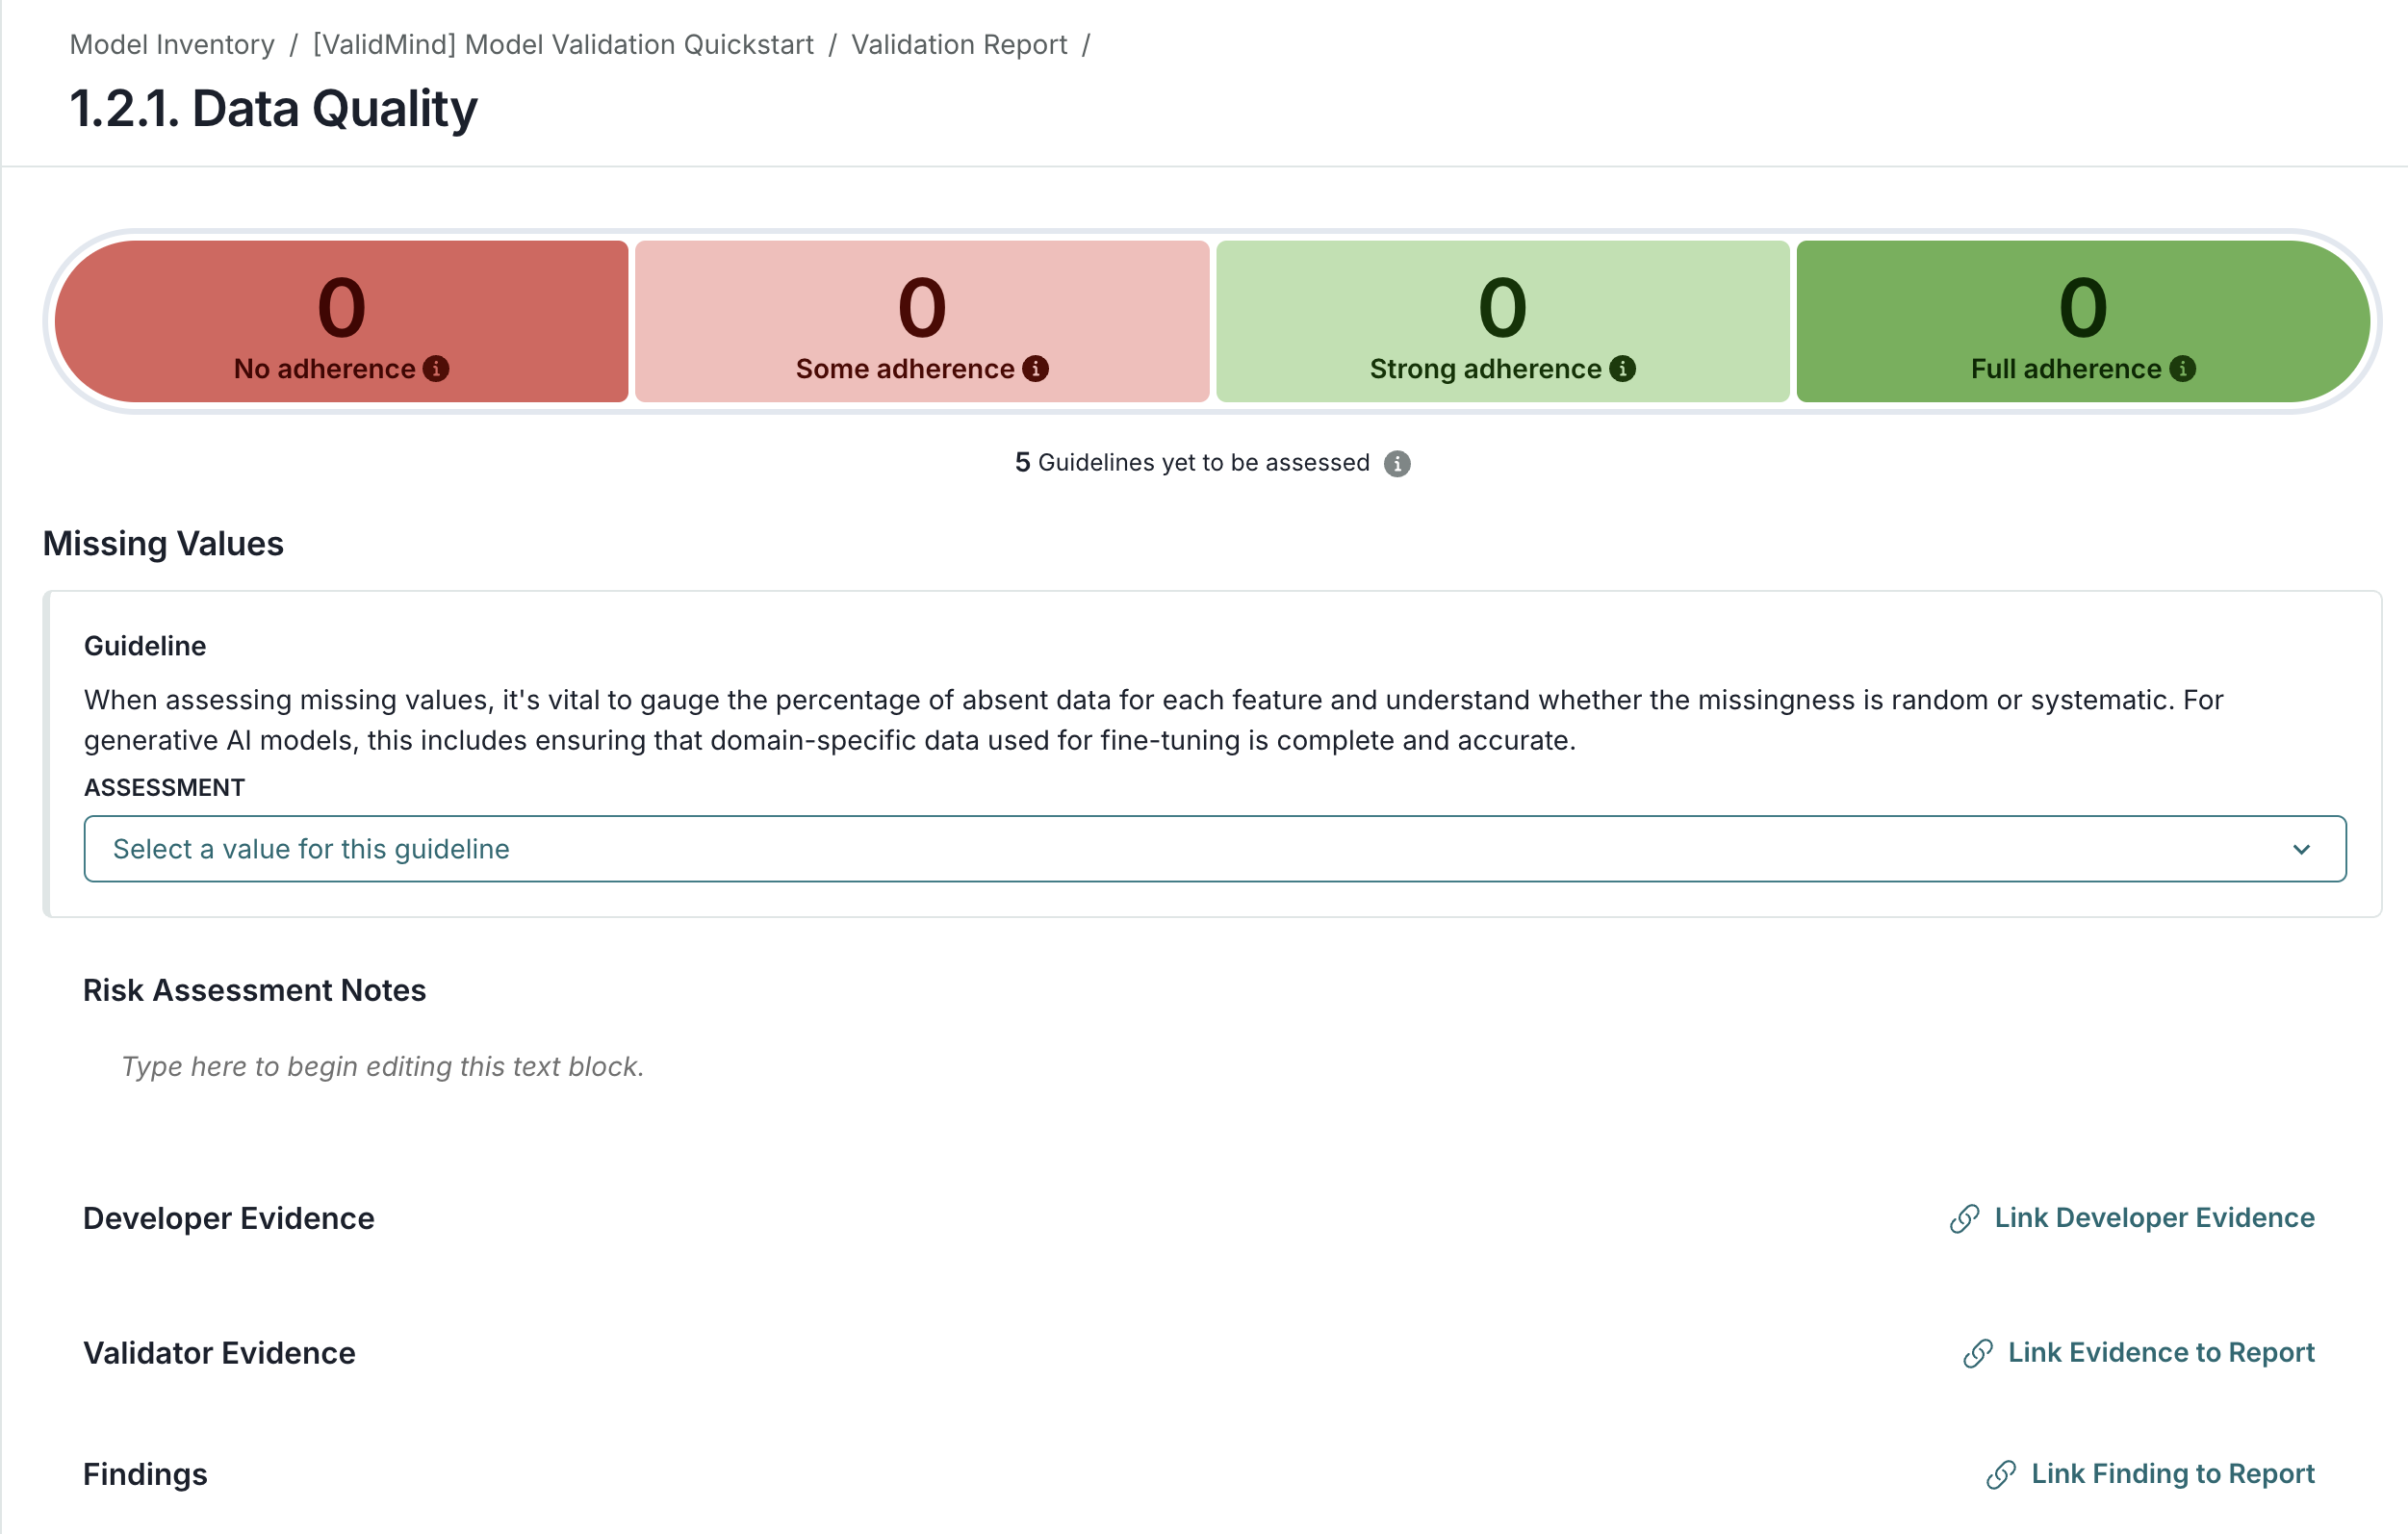
Expand any section of the validation report to attach your test results and drafts of test result summaries generated by the ValidMind Library as evidence by clicking Evidence on any guideline to expand the evidence panel.
For example:
Within your validation report, click on Class Imbalance Assessment.
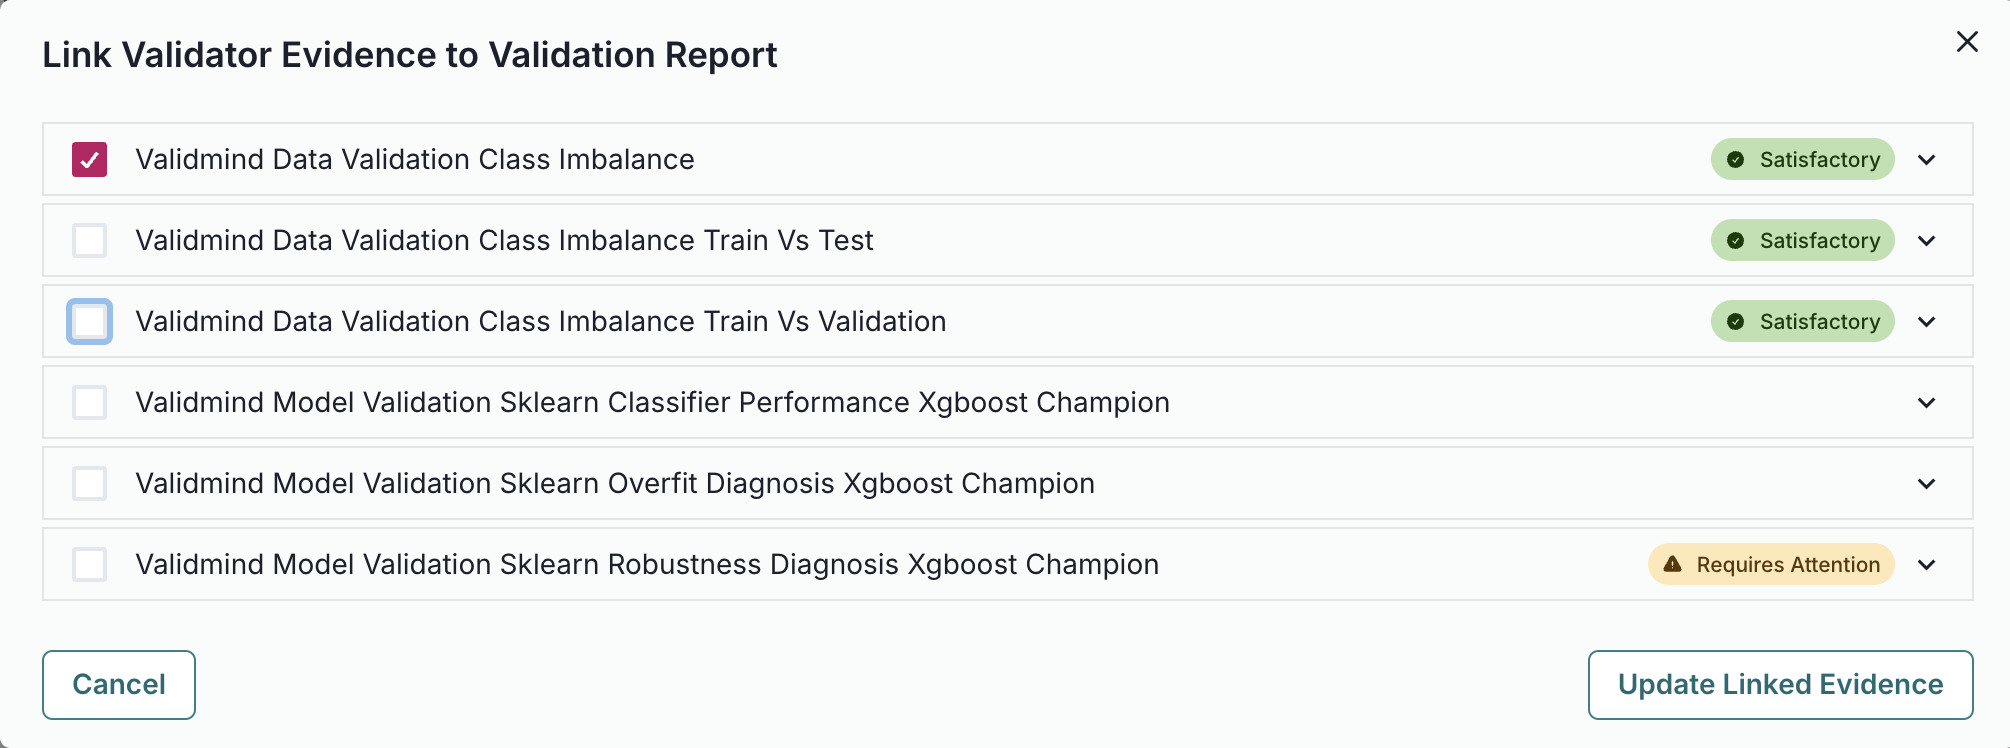
Under the Class Imbalance Assessment guideline click Link Evidence, then select Validator Evidence as the evidence type.
Select the Class Imbalance test results we logged: ValidMind Data Validation Class Imbalance
Click Update Linked Evidence to add the test results to the validation report.

Now that you’ve grasped the basics of using ValidMind for validation, continue on your journey with our end-to-end training course for validators and browse through our resource hub for the ValidMind Library: