Running Data
Quality Tests
Link validator evidence
With some test results logged, let’s head to the record we connected to at the beginning of this notebook and insert our test results into the validation report as evidence.
While the example below focuses on a specific test result, you can follow the same general procedure for your other results:
From the Inventory in the ValidMind Platform, go to the record you connected to earlier.
In the left sidebar that appears for your record, click Validation under Documents.
Click 2.2.1. Data Quality to expand that section.
Under the Class Imbalance Assessment guideline, click Evidence to expand the evidence panel.
Click Link Evidence, then select Validator Evidence.
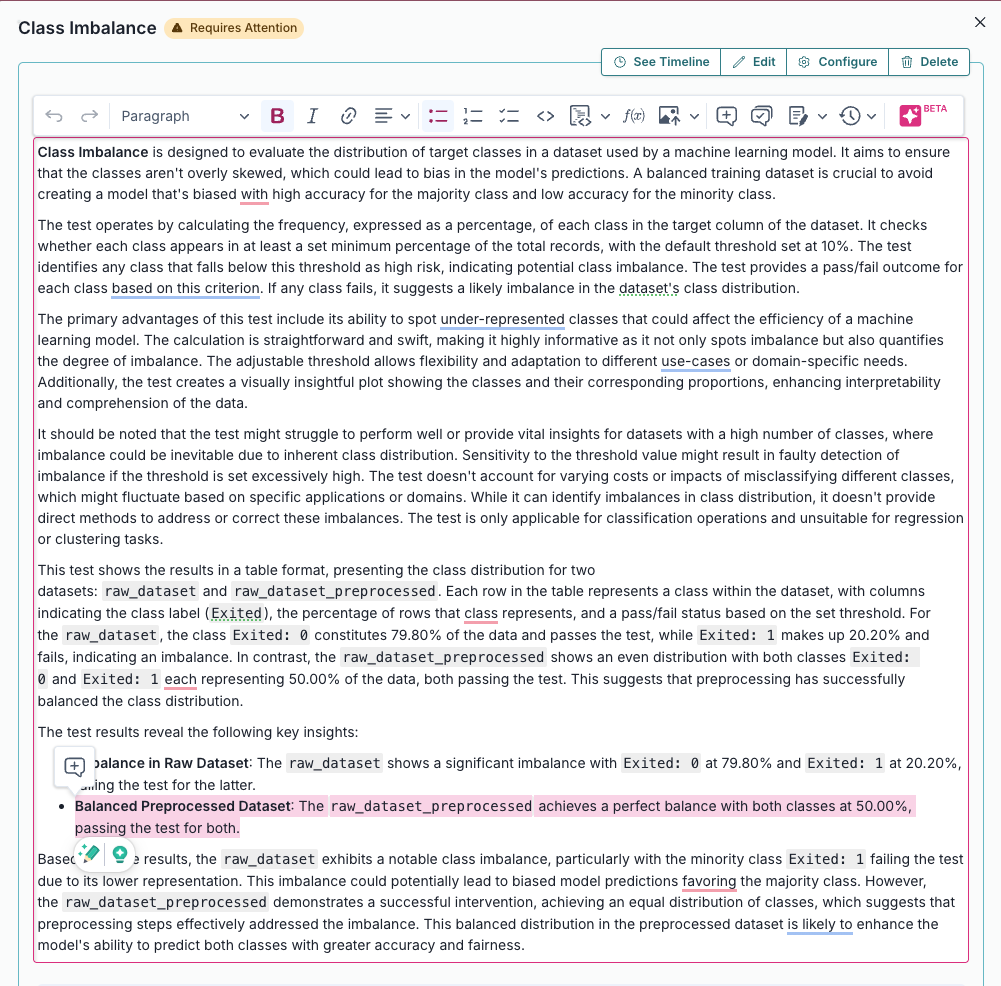
Select the Class Imbalance test results we logged: ValidMind Data Validation Class Imbalance
![Screenshot showing the ClassImbalance tests selected]()
The ClassImbalance tests selected Click Update Linked Evidence to add the test results to the validation report.
Confirm that the results for the Class Imbalance test you inserted has been correctly inserted into right section under 2.2.1. Data Quality of the report.
Once linked as evidence to section 2.2.1. Data Quality, note that the ValidMind Data Validation Class Imbalance test results are flagged as Requires Attention — as they include comparative results from our initial raw dataset.
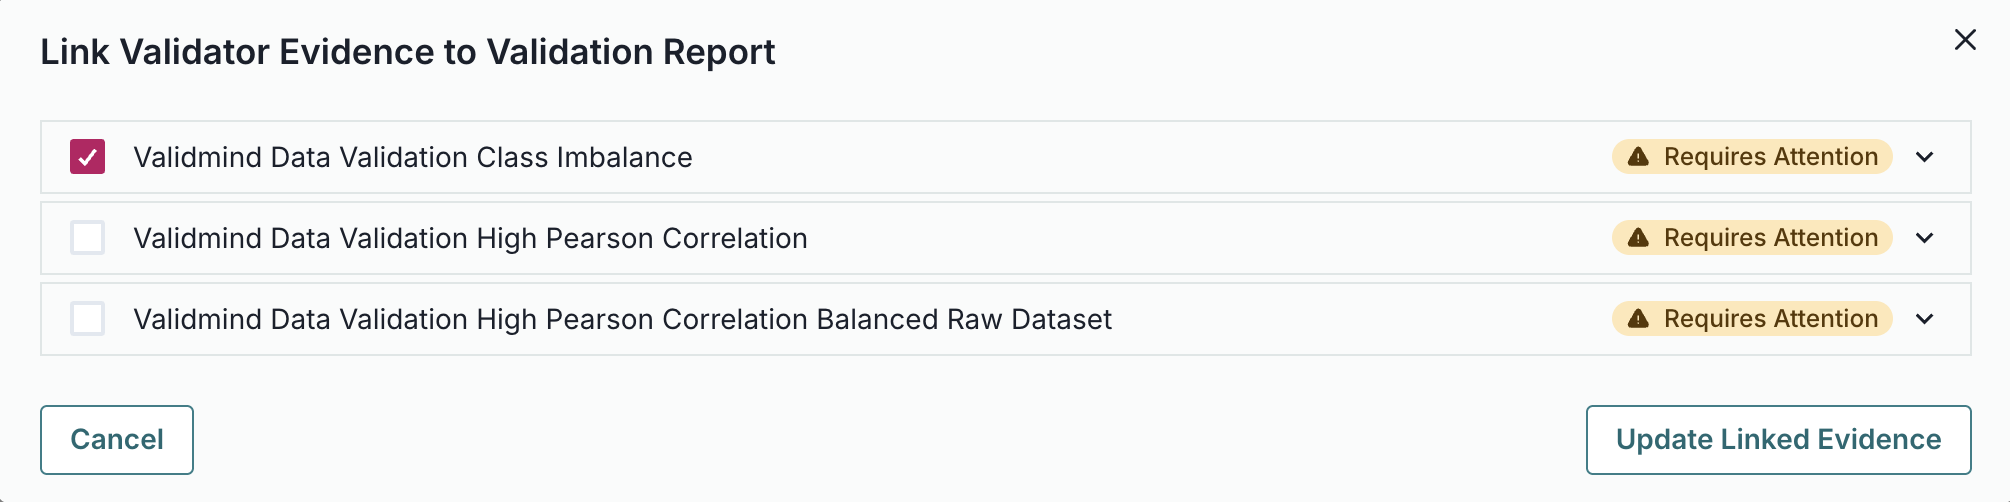
Click See evidence details to review the LLM-generated description that summarizes the test results, that confirm that our final preprocessed dataset actually passes our test:
![Screenshot showing the ClassImbalance test generated description in the text editor]()
ClassImbalance test generated description in the text editor